
Add a contact or lead form to your website
A form on your website turns a curious visitor into a real lead you can follow up with. CommunitySync gives you two form blocks that drop submissions straight into your community's leads inbox, so nothing gets lost in a personal email account. This article shows you how to add one, point it at the right privacy policy, and confirm where the leads land.
Only community owners and admins can edit the website, inside the orange platform panel. Managers and agents can't. If you're new to the builder, start with the website builder overview.
Choose the right form block
Both blocks live in the Call to action group and both capture leads into your community. Pick based on how much persuasion the page needs.
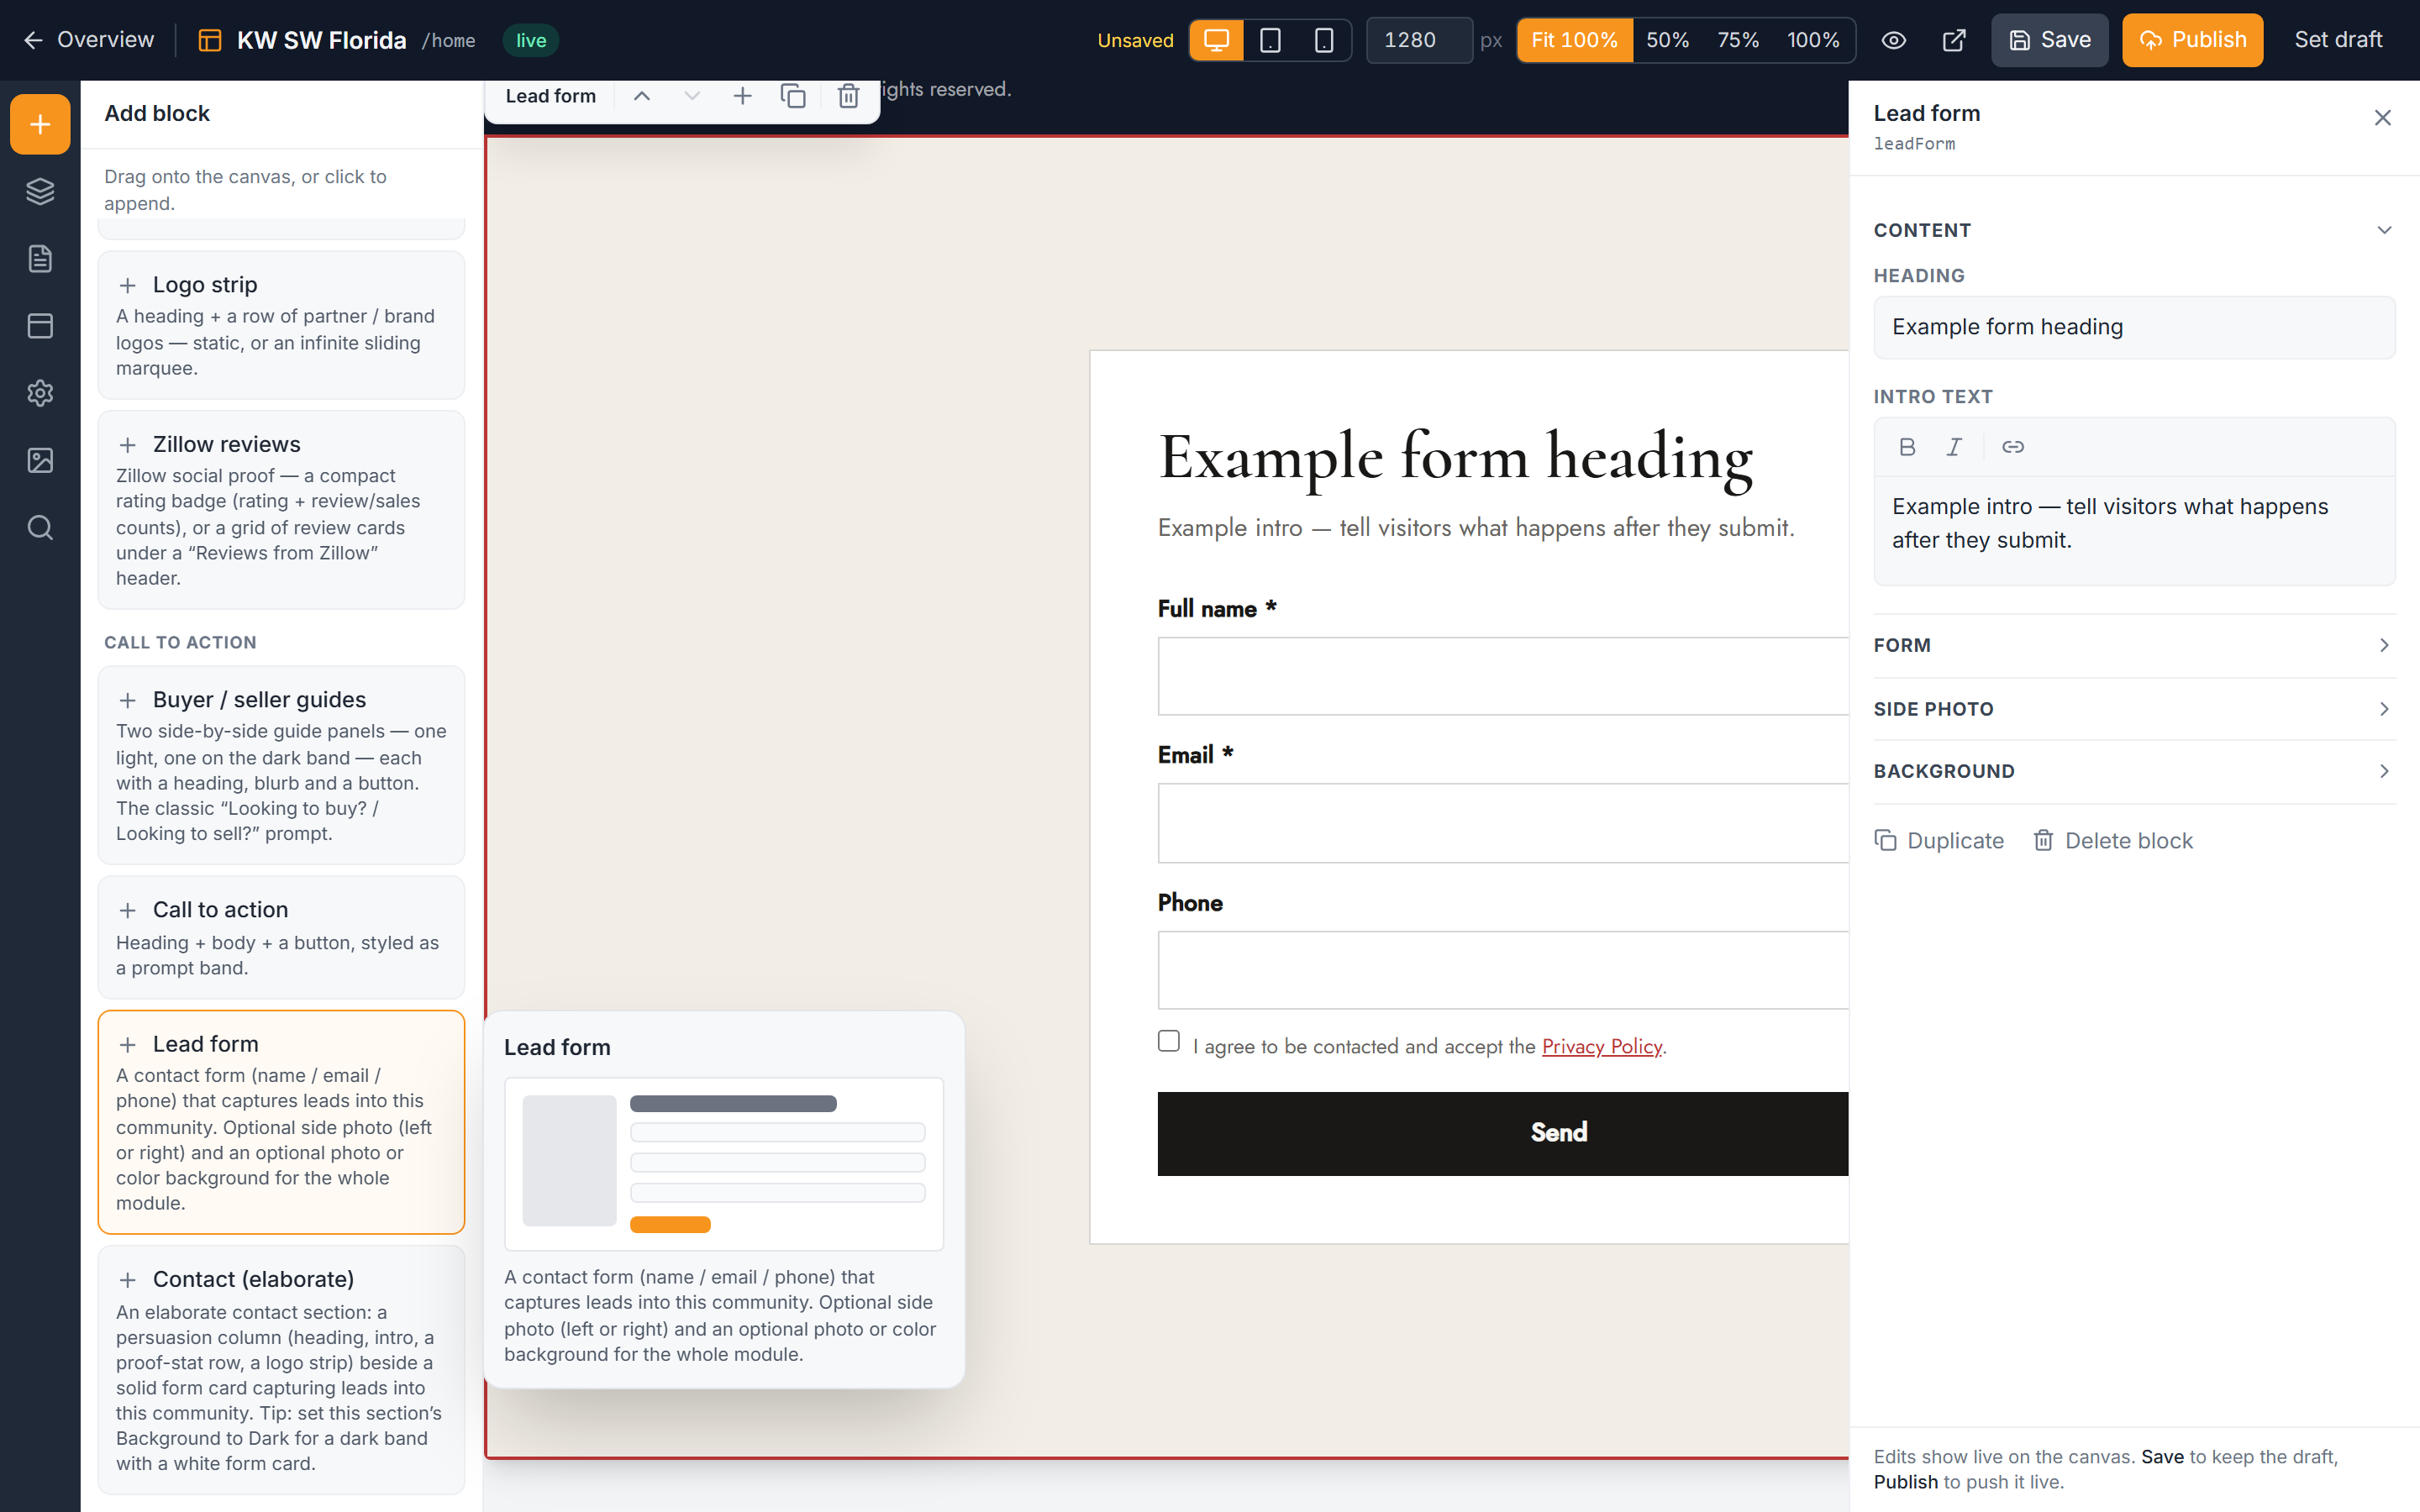
- Lead form — a straightforward name, email, and phone form. It comes with an intro, a button label, consent checkbox text, a privacy link, an optional reassurance line, an optional side photo, and an optional module background. Reach for this when you just need a clean, focused capture form.
- Contact (elaborate) — a persuasion layout: a column with proof stats and a logo strip sits beside a solid form card. Reach for this on a main contact page where you want to build trust before someone fills in the form. Tip: set its Background to Dark for a dark band with a crisp white form card.
Both are covered more broadly alongside the other action blocks in calls to action.
Add a form to a page
- Open the full-screen editor for the page you want the form on. See open the website editor if you need the way in.
- In the left icon rail, click Add to open the Add panel.
- Open the Call to action group and choose Lead form (or Contact).
- The block drops onto the canvas. Click it to open the right inspector.
- Fill in the heading and intro so visitors know what they're signing up for.
- Adjust the button label, consent checkbox text, and the optional reassurance line to match your voice.
- Click Save when you're happy with it.
Point the privacy link at the right policy
Every form includes a privacy link next to the consent checkbox. You choose where it goes in the inspector:
- Auto — uses your community's own privacy policy automatically. This is the recommended setting so the link always stays correct.
- Custom URL — paste any web address if you'd rather link somewhere specific.
Publish so the form goes live
Your form only accepts real submissions on the published site. Once the block looks right:
- Click Save in the editor.
- Publish the page so the change reaches the public site. See take your website live for the full publish flow.
Where your leads go
When someone submits either form, the inquiry lands in your community's Leads inbox, and CommunitySync sends a best-effort notification to the community's owner and admins so someone can follow up quickly. To learn how to read and work those leads, see understand your leads inbox.
Troubleshooting
The form won't submit when I test it
Forms only submit on the preview link or the live published page — not on the editor canvas. The canvas is for building, not for real submissions. Open the preview or the live site and test there.
A visitor said they couldn't send the form
The consent checkbox is required. If it isn't ticked, the form won't submit. Make sure your consent text is clear so visitors know to check the box.
I don't see the Lead form or Contact block
These lead-capture blocks aren't available on the platform's own marketing site — only on community websites. Confirm you're editing your community's site inside the orange platform panel.
My leads aren't showing up
Check that the page with the form has been published, and that you're testing on the live or preview page rather than the editor. New submissions appear in your community's Leads inbox — see understand your leads inbox.