
Manage your website images (Asset Library)
Every website has one shared media library, so you upload an image once and drop it wherever you need it. The library also flags images borrowed from other sites — the kind that vanish without warning — and lets you copy them onto your own storage in one click. This article covers how to add media, reuse it, and keep it from breaking. Only community owners and admins can do this, inside the orange platform panel.
Open the Asset Library
- Open the website editor. If you're not sure how, see Open the website editor.
- In the left icon rail, click Assets. This is your site's single media library — every image and video the site uses lives here.
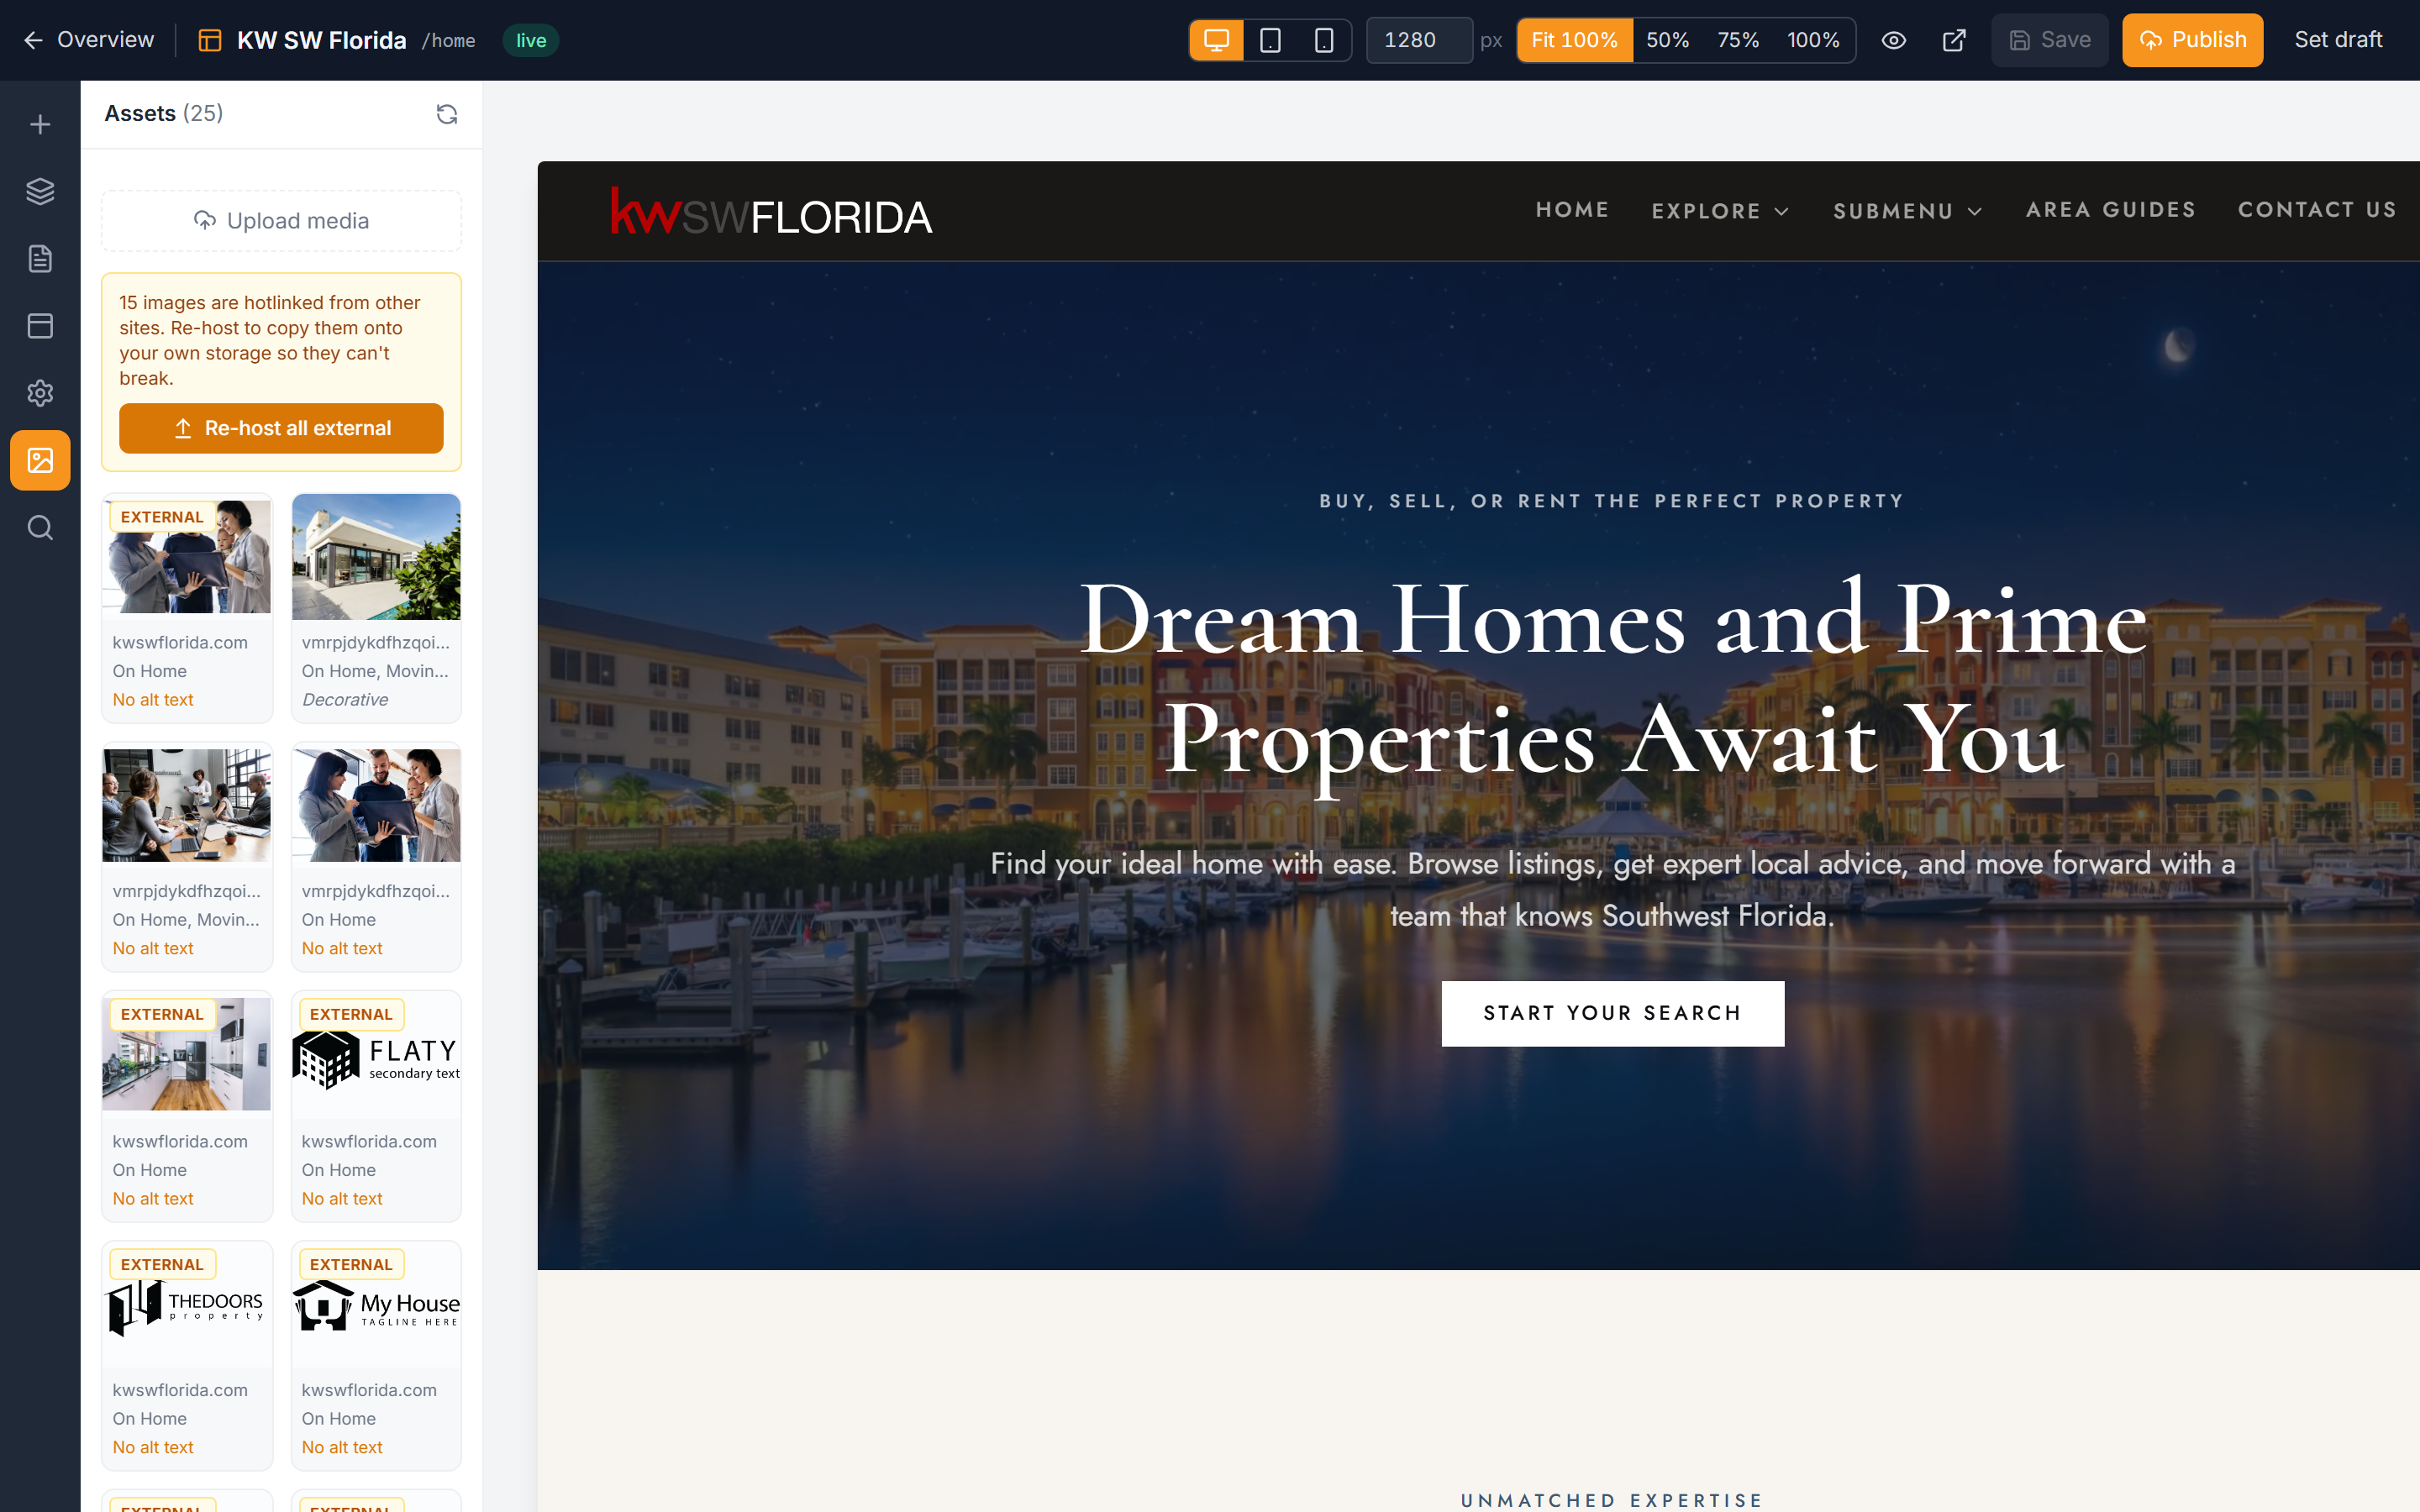
Each tile shows you three things at a glance: the source host (where the file is stored), where it's used on your site (or Unused if nothing references it yet), and its alt status (whether the image has descriptive alt text). Alt text matters for accessibility and search — see Image alt text.
Add media to the library
- In the Assets tab, click Upload media.
- Choose one or more image or video files. They're added straight to the library, ready to use anywhere on the site.
Uploads are automatically downscaled to roughly 1920 pixels wide. That keeps your pages fast without any effort on your part, and it's plenty of resolution for full-width website images.
Re-scan for images already on your pages
If you've added images through block fields or imported content, the library can pick them up automatically.
- In the Assets tab, click the rescan (refresh) icon.
- The editor re-checks every page for referenced media and updates the library, including each tile's "where it's used" status.
Run a rescan any time the "used" or Unused labels look out of date.
Reuse an image anywhere
You don't need to re-upload an image you've already added. On any image field elsewhere in the editor:
- Click Choose from library.
- Pick the image you want from your existing media.
You can also drag a file straight from your computer and drop it onto that picker to upload and use it in one step.
Fix hotlinked (external) images
If an image is loaded directly from another website instead of your own storage, its tile shows the source as External. Hotlinked images are risky — if the other site moves or removes the file, it disappears from your site too.
When the library finds external images, an amber banner appears at the top:
- Click Re-host all external in the banner.
- The editor copies those images onto your own storage so they can no longer break.
Each run is capped at a set number of images, so if the banner is still there afterward, some remain — just click Re-host all external again to finish the rest.
Troubleshooting
I deleted an asset but it came back
Deleting a tile only removes the library entry, not the underlying file. If the image is still used somewhere on your site, the next rescan will detect it and the tile reappears. To remove it for good, first replace or remove the image everywhere it's used, then delete the library entry.
The amber "external images" banner won't go away
Re-hosting is capped per run to keep things stable. If external images remain after one pass, click Re-host all external again. Repeat until the banner clears.
A tile says "Unused" but I know it's on a page
Click the rescan (refresh) icon to re-check your pages. The used/unused labels only update when the library scans, so a fresh rescan should correct it.
My image looks lower-resolution than the original
Uploads are automatically downscaled to about 1920 pixels wide. That's intentional for web performance and is more than enough for full-width images. If you need the original at full size, keep a copy outside the builder.