
Set up your site's navigation menu
Your navigation bar is the menu that sits at the top of every page — logo on one side, menu links across, and usually a standout button on the right. You design it once and it appears everywhere, so visitors always know where they are and how to get around. Only community owners and admins can edit it, inside the orange platform panel.
Open the Nav & footer tab
Your nav bar and footer are your site's "chrome" — the shared frame that wraps every page. You build both in one place.
- Open the full-screen website Editor (see Open the website editor).
- In the left icon rail, click Nav & footer.
- Choose the Navbar sub-tab. (The footer lives on its own sub-tab — see Build your footer.)
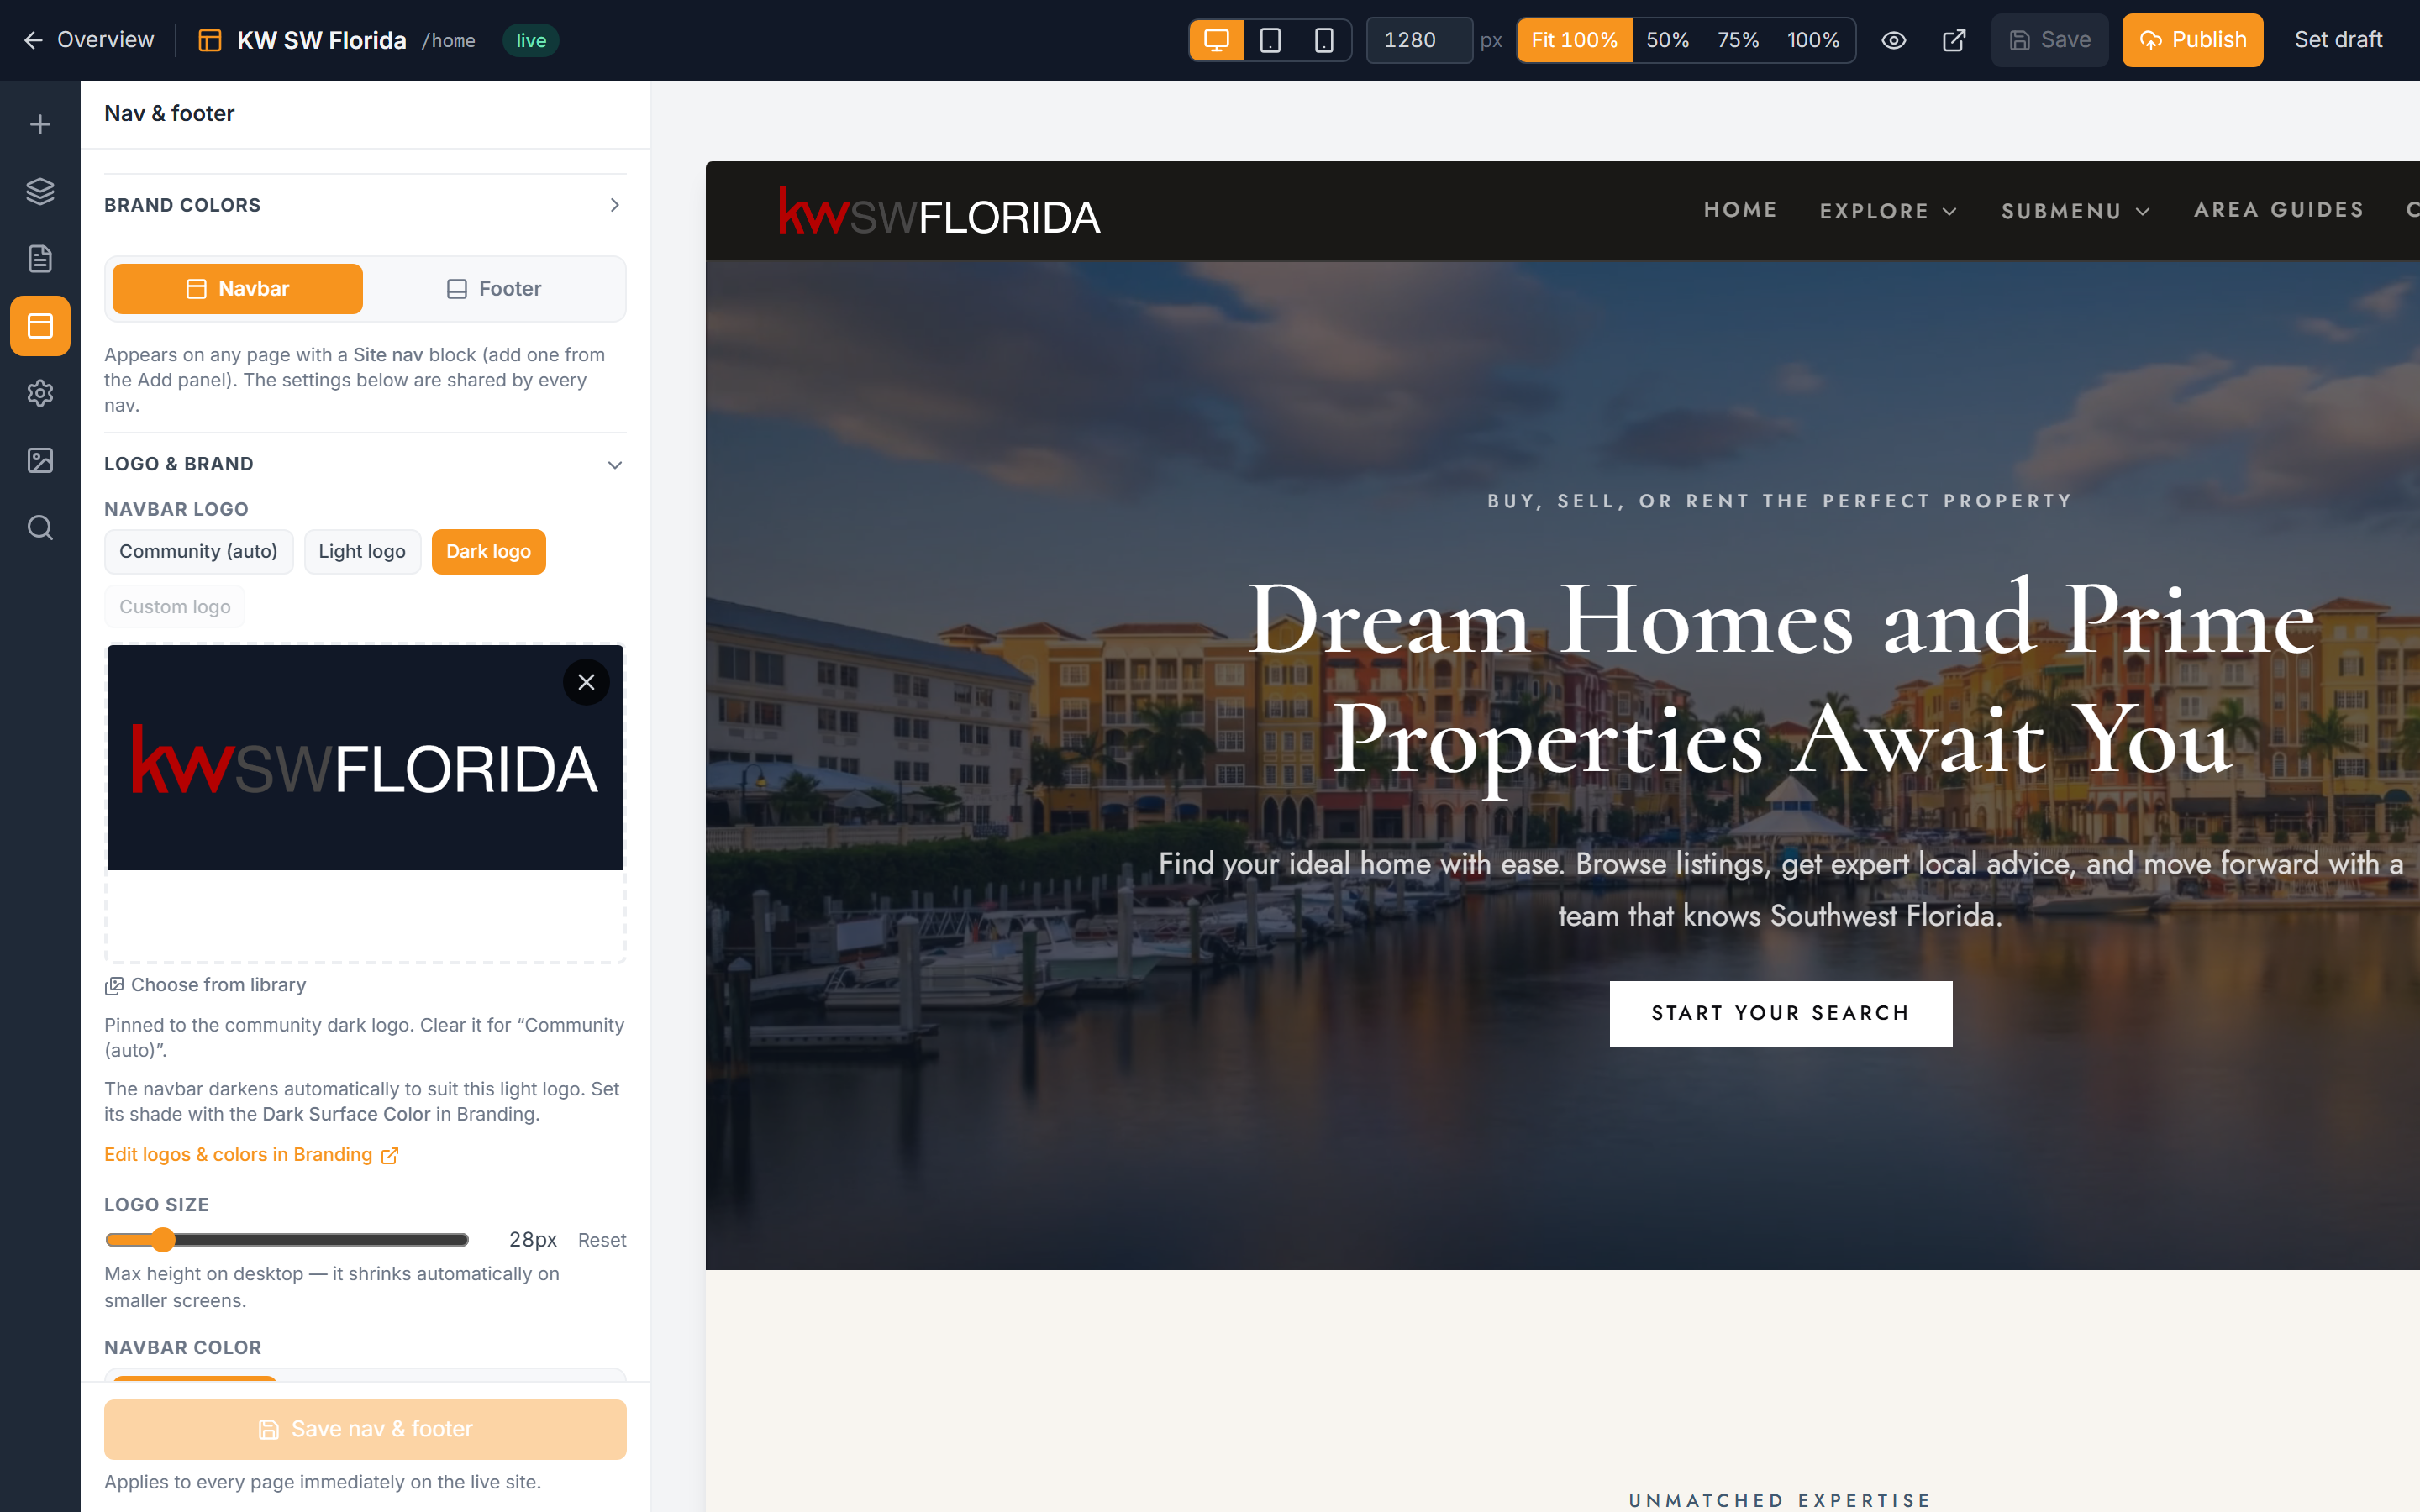
Important: chrome changes go live the moment you save — there is no draft step. The save button reads Applies to every page immediately, so treat every edit here as public.
Set your logo and brand
The Logo & brand section controls the left side of your nav bar.
- Upload a logo image, or leave it blank to fall back to your brand text.
- Use the Logo size slider to scale it up or down.
- Set Navbar colour to Auto, Light, or Dark so the bar reads clearly against your pages.
- Optionally add a tagline to sit alongside the logo.
Build the menu
The Menu section decides which pages appear as links and in what order.
- Turn on Auto-list pages in the menu to pull your site's pages into the nav.
- For each page, tick it to include it, or untick to hide it from the menu.
- Rename any page's menu label so it reads well in the bar.
- Reorder links with the up and down controls.
- To group pages into a dropdown, type the same Submenu name on two or more pages — they'll collapse under that heading.
- Set the collapse-to-hamburger breakpoint to control the screen width at which the full menu becomes a compact hamburger icon.
These page changes save instantly as you make them.
Add custom links
Use Custom links for destinations that aren't site pages — an external booking page, a policy document, a link to another site.
- In the Custom links section, add a link with its label and destination.
- Optionally give it a submenu name to group it with other links under a dropdown heading.
- Turn on new-tab if the link should open in a separate browser tab.
Custom links appear after your menu pages.
Add a call-to-action button
The Button section gives you one emphasized call-to-action on the far side of the nav — the action you most want visitors to take.
- In the Button section, set the label (for example, "Book a call" or "Join us").
- Set its link destination.
- Choose a solid or outline style.
For more on how CTA buttons work across your site, see Calls to action.
How dropdowns (submenus) work
Dropdowns let you tuck related pages under a single heading. A few rules keep them predictable:
- Dropdowns are one level deep — you can't nest a submenu inside another submenu.
- A submenu heading is a toggle, not a clickable link. Give the dropdown a landing page by adding a real page as its first item.
- A submenu only appears once two or more items share the exact same submenu name. A single item with a submenu name just shows as a normal link.
Save your changes
When you're done, click Save nav & footer. Remember the button's own reminder — Applies to every page immediately — so your visitors see the update right away.
Make sure your pages show the nav
The nav bar only appears on a page that contains a Site nav block.
- Auto-generated system pages get the Site nav block automatically.
- Hand-built pages do not — you have to add one yourself.
To add it: open the page, click Add in the left rail, and insert a Site nav block. (See Add and arrange blocks.)
Troubleshooting
My nav isn't showing on a page
That page is missing its Site nav block. System pages get one automatically, but any page you built by hand needs one added manually. Open the page, click Add, and insert a Site nav block.
My dropdown split into two
Two pages you meant to group have slightly different submenu names — even a small difference in spelling, spacing, or capitalization creates two separate dropdowns. Open each page and make the Submenu name match exactly, character for character.
My dropdown heading doesn't go anywhere when clicked
That's expected — a submenu heading is a toggle that opens the dropdown, not a link. To give it a destination, add a real page as the first item in that submenu so there's a clear landing page.
My changes went live before I was ready
Chrome has no draft stage. Every save on the Nav & footer tab publishes immediately across every page, as the Applies to every page immediately button warns. Make edits when you're ready for visitors to see them.