
Show your property listings on your website
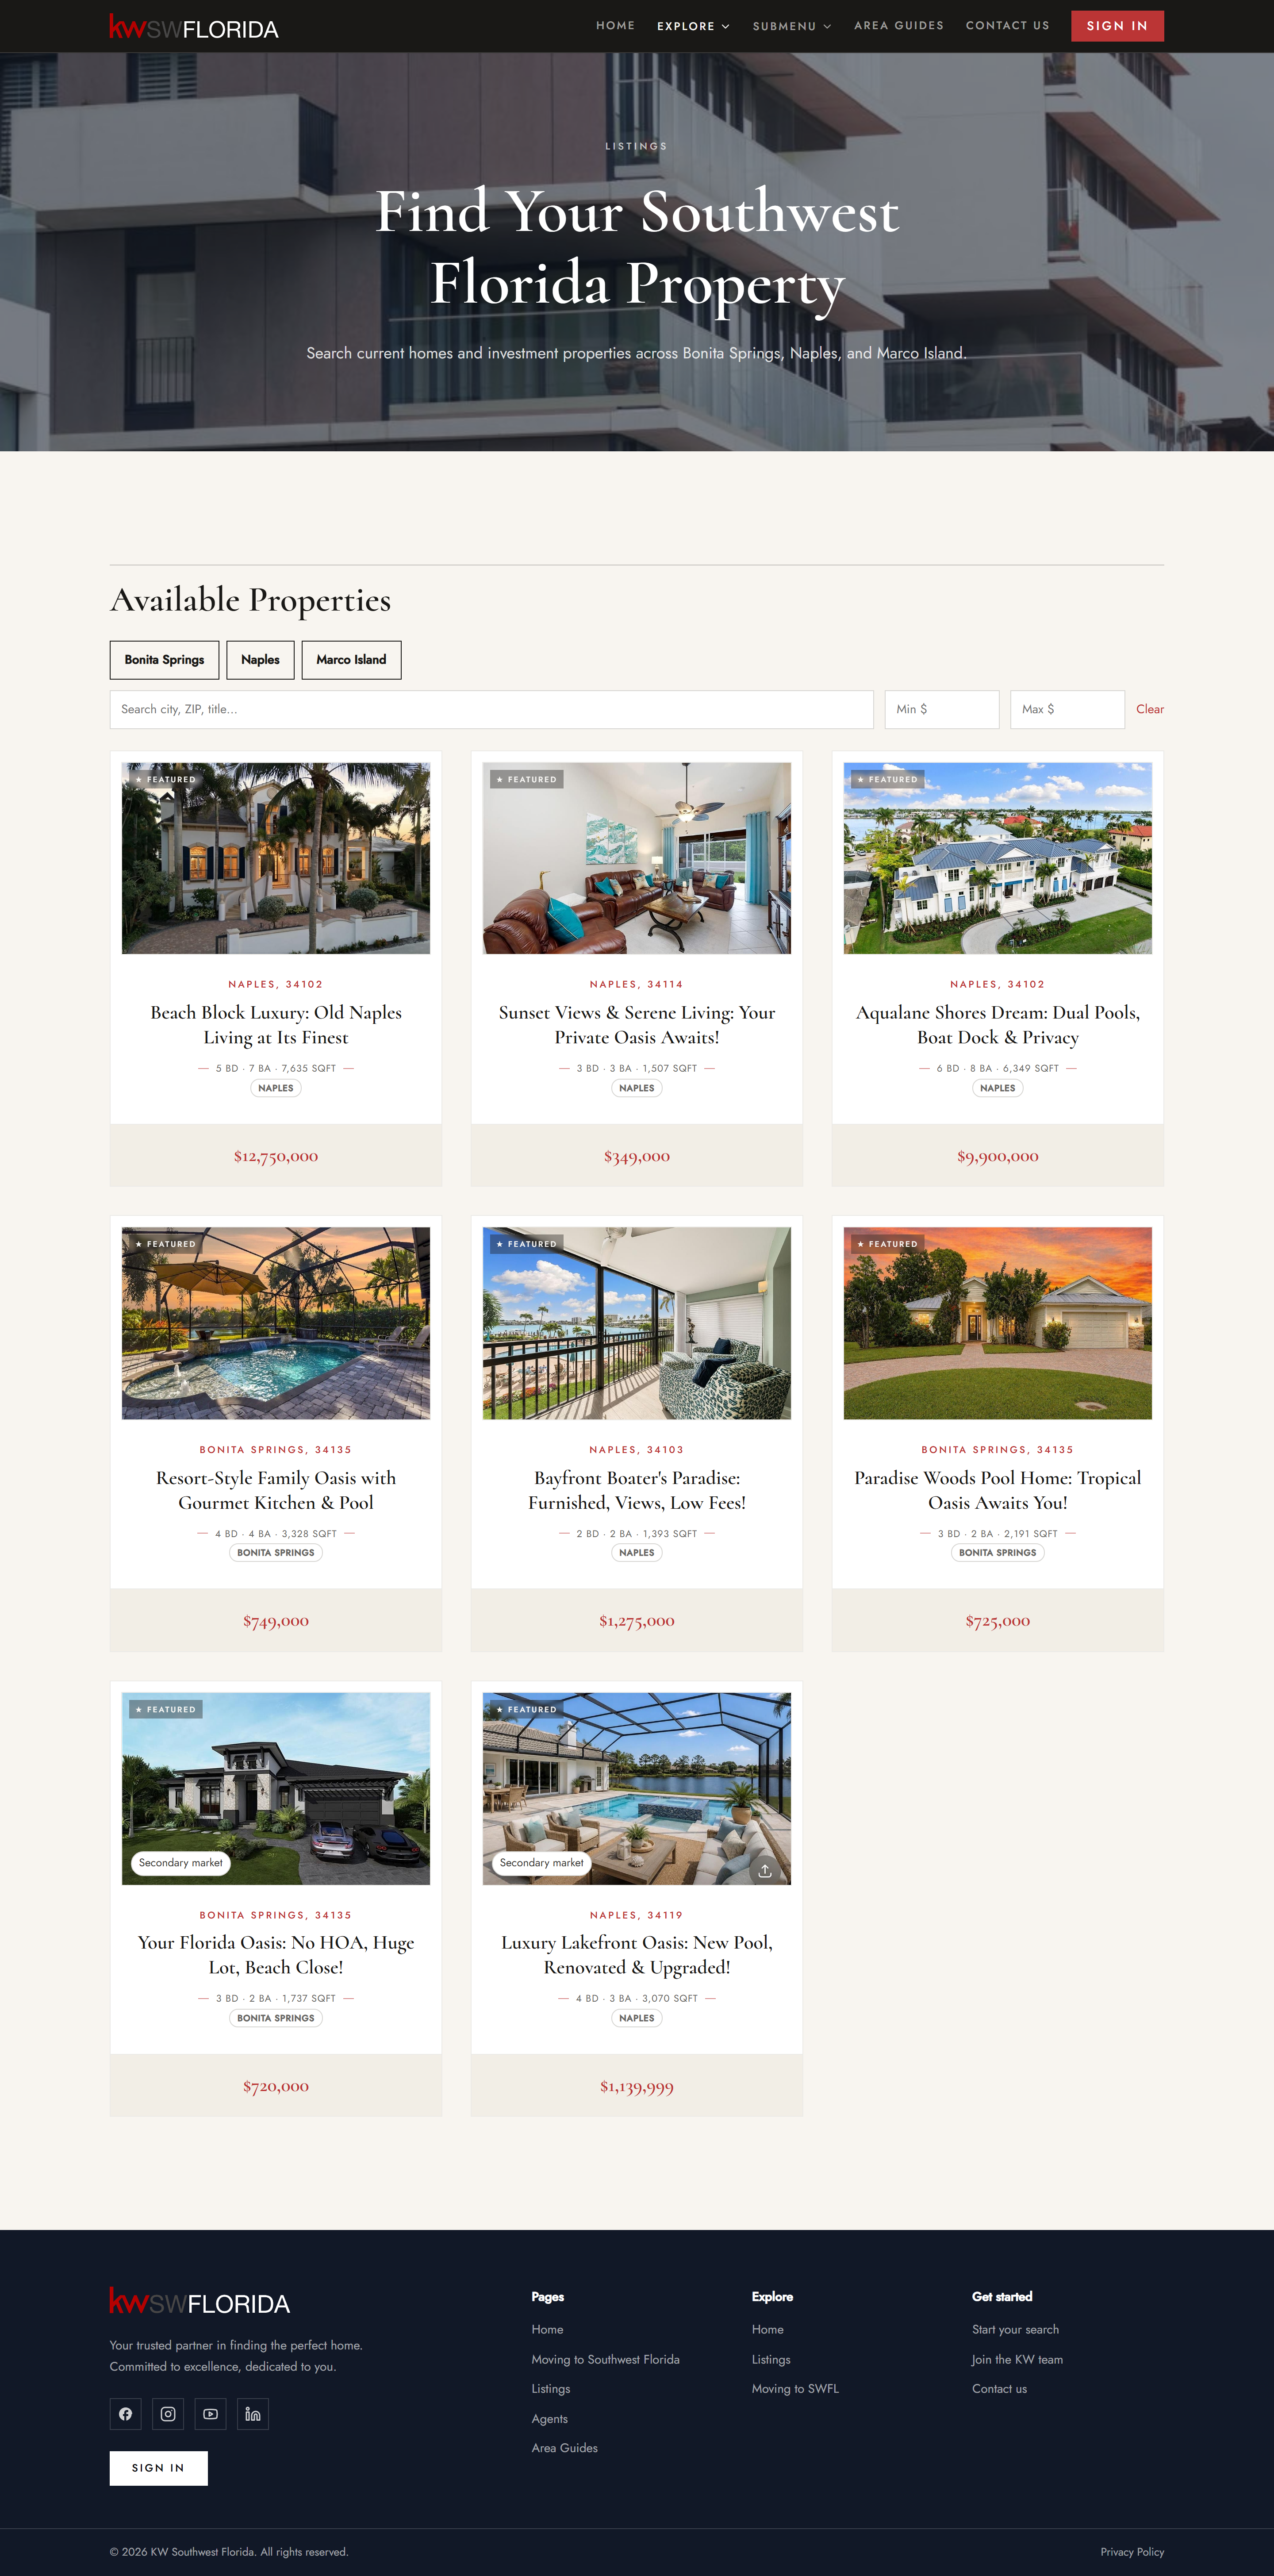
The Listings block turns any page into a shopfront for your community's property listings. Drop it in once and it pulls in every live listing on its own — no attaching listings one by one — and gives visitors search, filters, and a way to enquire, all without you touching the page again.
Add the Listings block
The website is edited by community owners and admins in the orange platform panel, inside the full-screen editor. Managers and agents can't edit it.
- Open the editor for your community website (see Open the website editor) and go to the page where you want listings to appear.
- On the left icon rail, click Add to open the block panel.
- Choose the Content category and click Listings.
- The block drops onto the canvas. Select it to open its settings in the right inspector.
Set up the block
With the block selected, use the right inspector to shape how listings appear:
- Set an Eyebrow (the small label above the heading) and a Heading — for example "Featured Homes" or "Browse Listings".
- Choose Show: pick Featured to display only your hand-picked featured listings, or All to show the full directory.
- Set Columns to control how many listings sit side by side.
- Set Max listings to cap how many appear in the block.
- Optionally turn on Limit to market centers and pick which centers to include.
- Listings that aren't tagged to any market center always show, regardless of this setting.
- If you select none, every market center is included.
- This just sets the starting pool — visitors can still filter within it on the live page.
How it fills itself
You don't attach listings to this block one at a time. It reads straight from your community's opportunities, so whenever a listing is added or updated, the block reflects it automatically.
On the published page, the block does much more than the static preview:
- Visitors get search and filters to narrow the set.
- Long lists break into pages so nothing loads all at once.
- Clicking a listing opens an inline detail carousel with its photos.
- A built-in lead form lets visitors enquire without leaving the page.
Each listing also gets its own shareable page at `/listings/<title>-<id>`, so you can link straight to a single property from an email, a post, or another page.
When a listing goes away
If a listing is later removed from your community, its individual page doesn't turn into a broken error. Instead, the old link shows a friendly "no longer available" page, so any link you shared earlier still lands somewhere sensible.
Pair it with a hero search bar
If your page uses a hero block with a search bar (see Hero blocks), point that search at the same page that holds your Listings block. That way, when a visitor searches from the hero, they land on the listings and see filtered results right away.
Want to show your agents the same way? See Show your agent directory on your website.
Troubleshooting
Search and filters don't do anything in the editor
The search bar, filters, paging, and lead form only run on the preview or the live page — not on the editor canvas. Open the preview (or view the published site) to test them.
No listings show up
Check the Show setting. If it's set to Featured and none of your listings are marked featured, the block will look empty — switch to All, or feature some listings. Also confirm your Limit to market centers selection isn't excluding everything you expected.
The hero search doesn't find my listings
Make sure the hero's search targets the page that actually contains the Listings block. If the hero points somewhere else, visitors won't land on your listings.