
Add and edit entries in a collection
A collection turns one reusable layout into many pages — every blog post, case study, or resource shares the same design, and each entry just fills in the words. This article covers adding an entry, editing its fields, and publishing it. If you're new to how collections work, start with Collections overview.
Who can do this
The website builder — including the CMS — is edited by community owners and admins inside the orange platform panel. Community managers and agents cannot edit it, and there is no member-facing editor.
Open the CMS
- In the orange platform panel, go to Website, then open CMS.
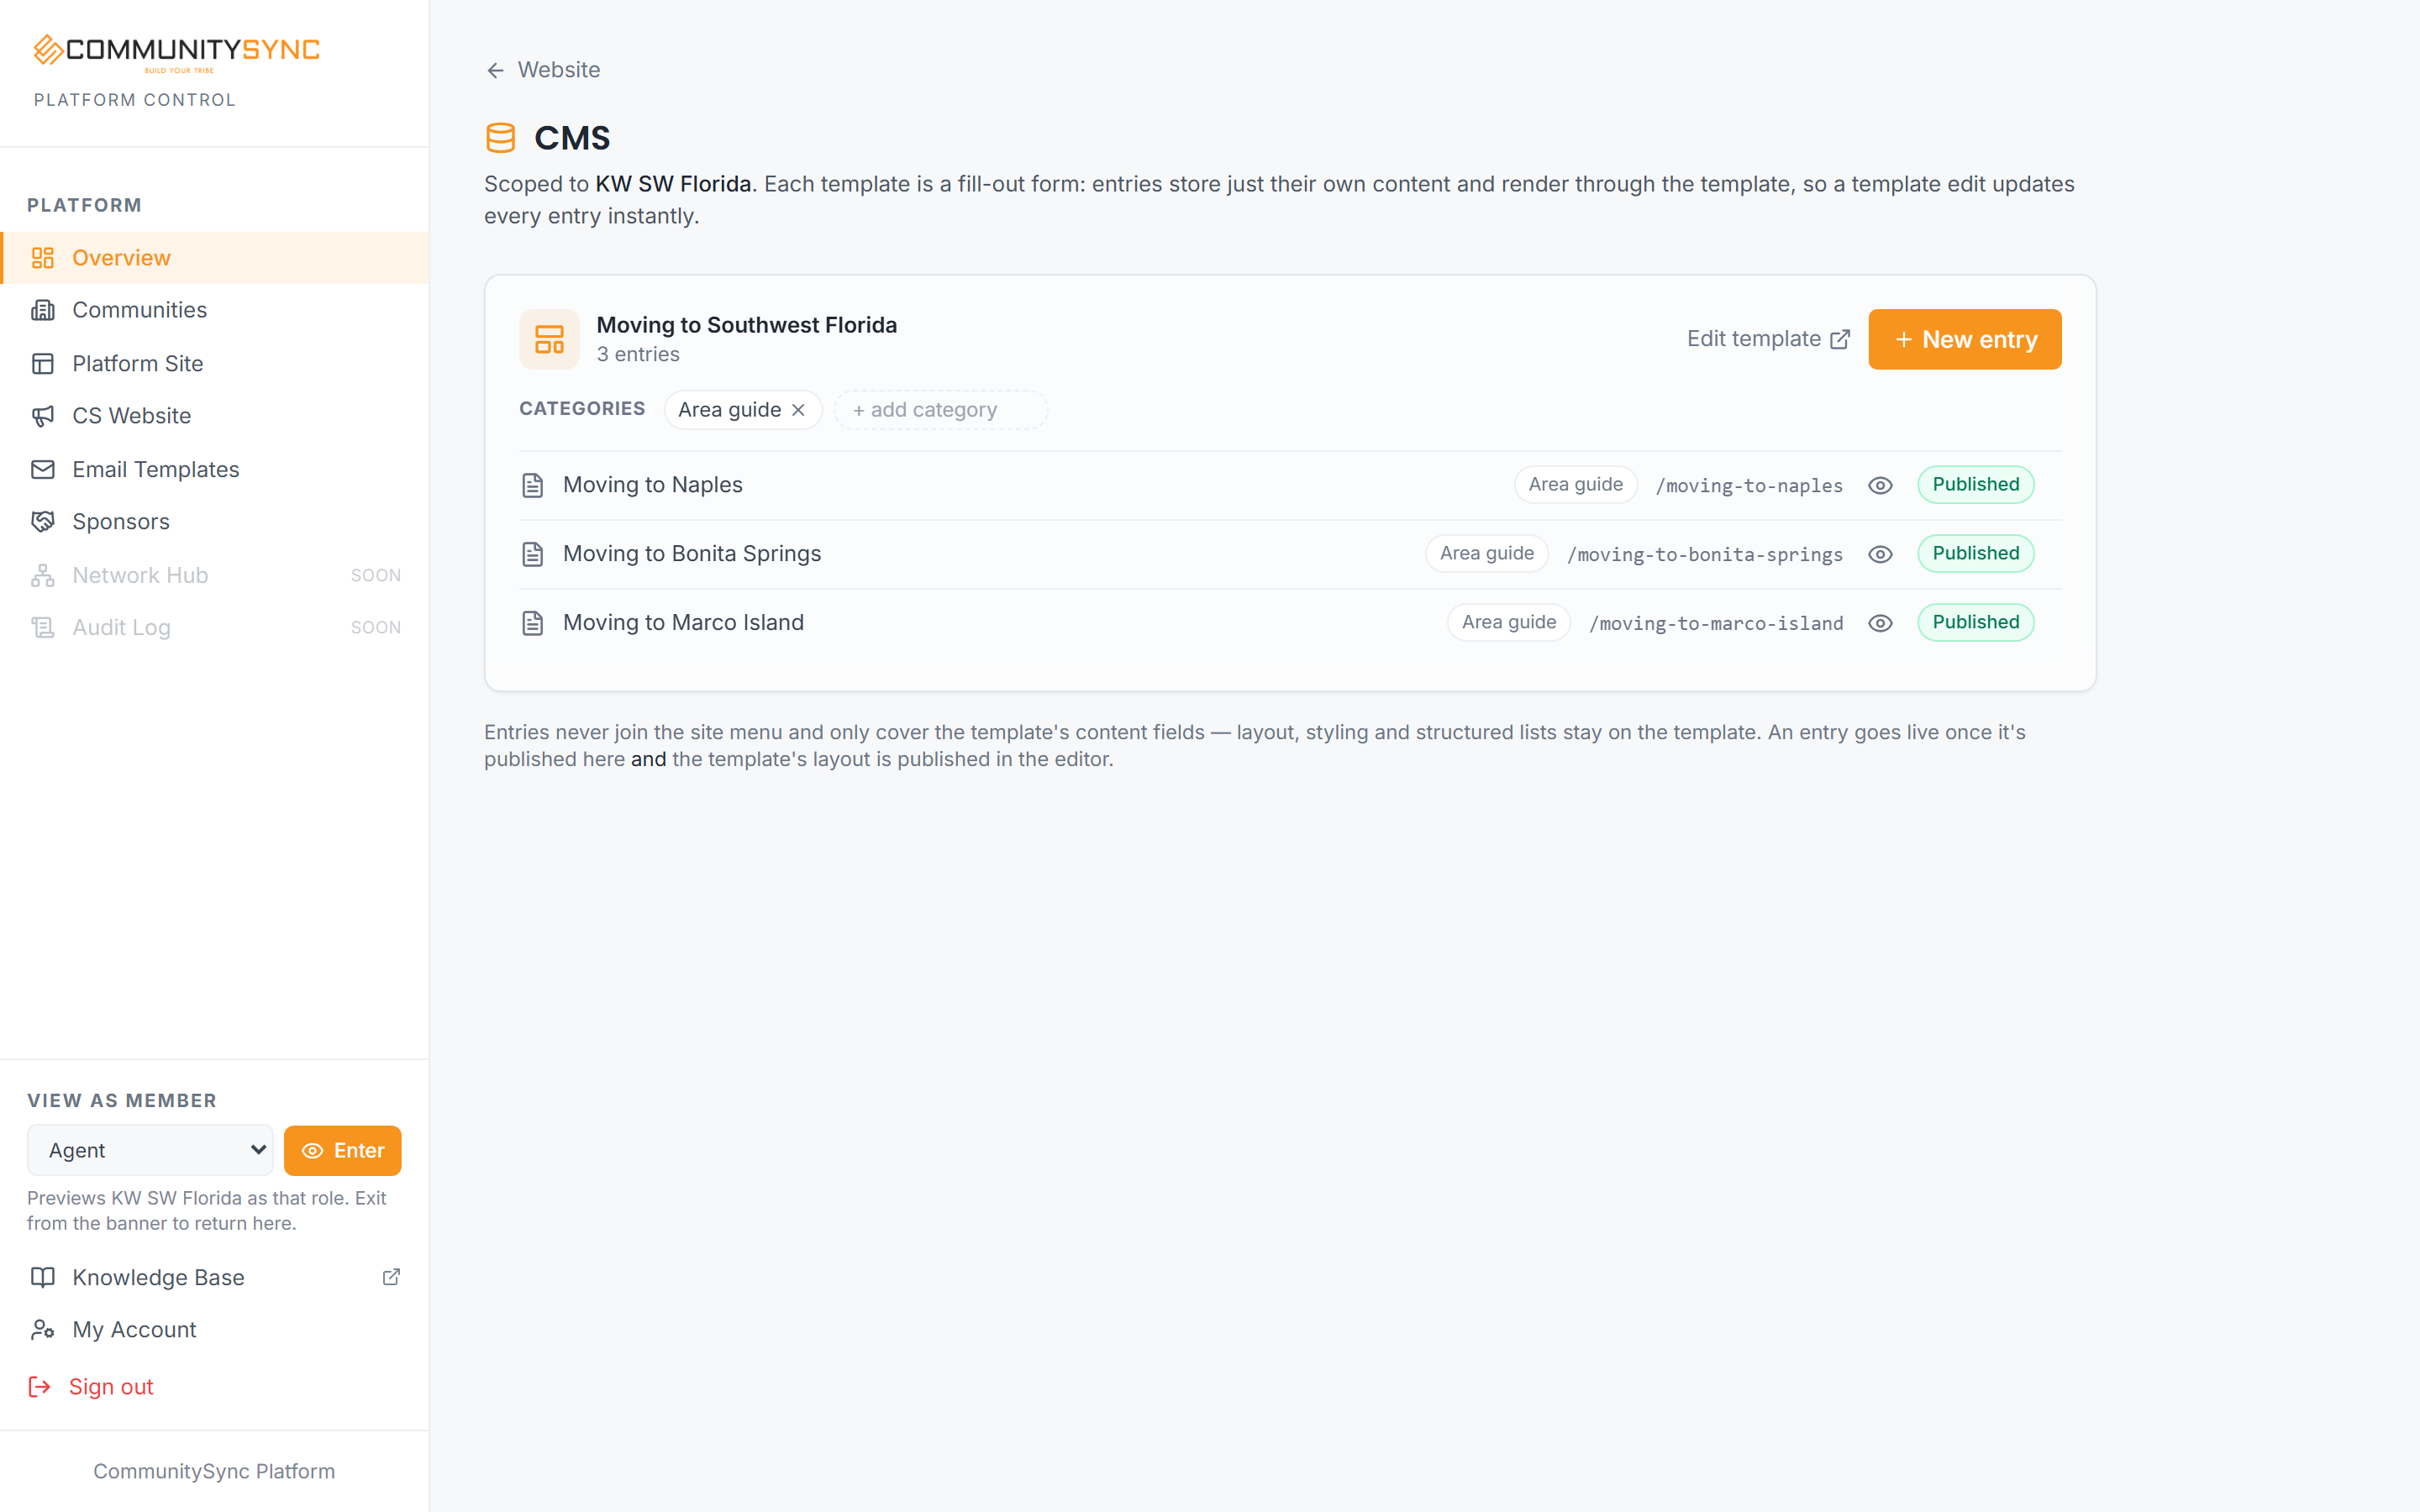
- Each collection template appears as its own card, showing the template name, how many entries it has, a category roster editor, a New entry button, and a list of entry rows. Each row carries a Published or Draft badge so you can see its status at a glance.
Add a new entry
- On the template card, click New entry.
- Type a title for the entry.
- Click Create. A form opens, auto-generated from the blocks in that template's layout.
The new entry starts as a Draft — it won't appear on your site until you publish it (and meet the two other conditions in Troubleshooting below).
Find your way around the editor
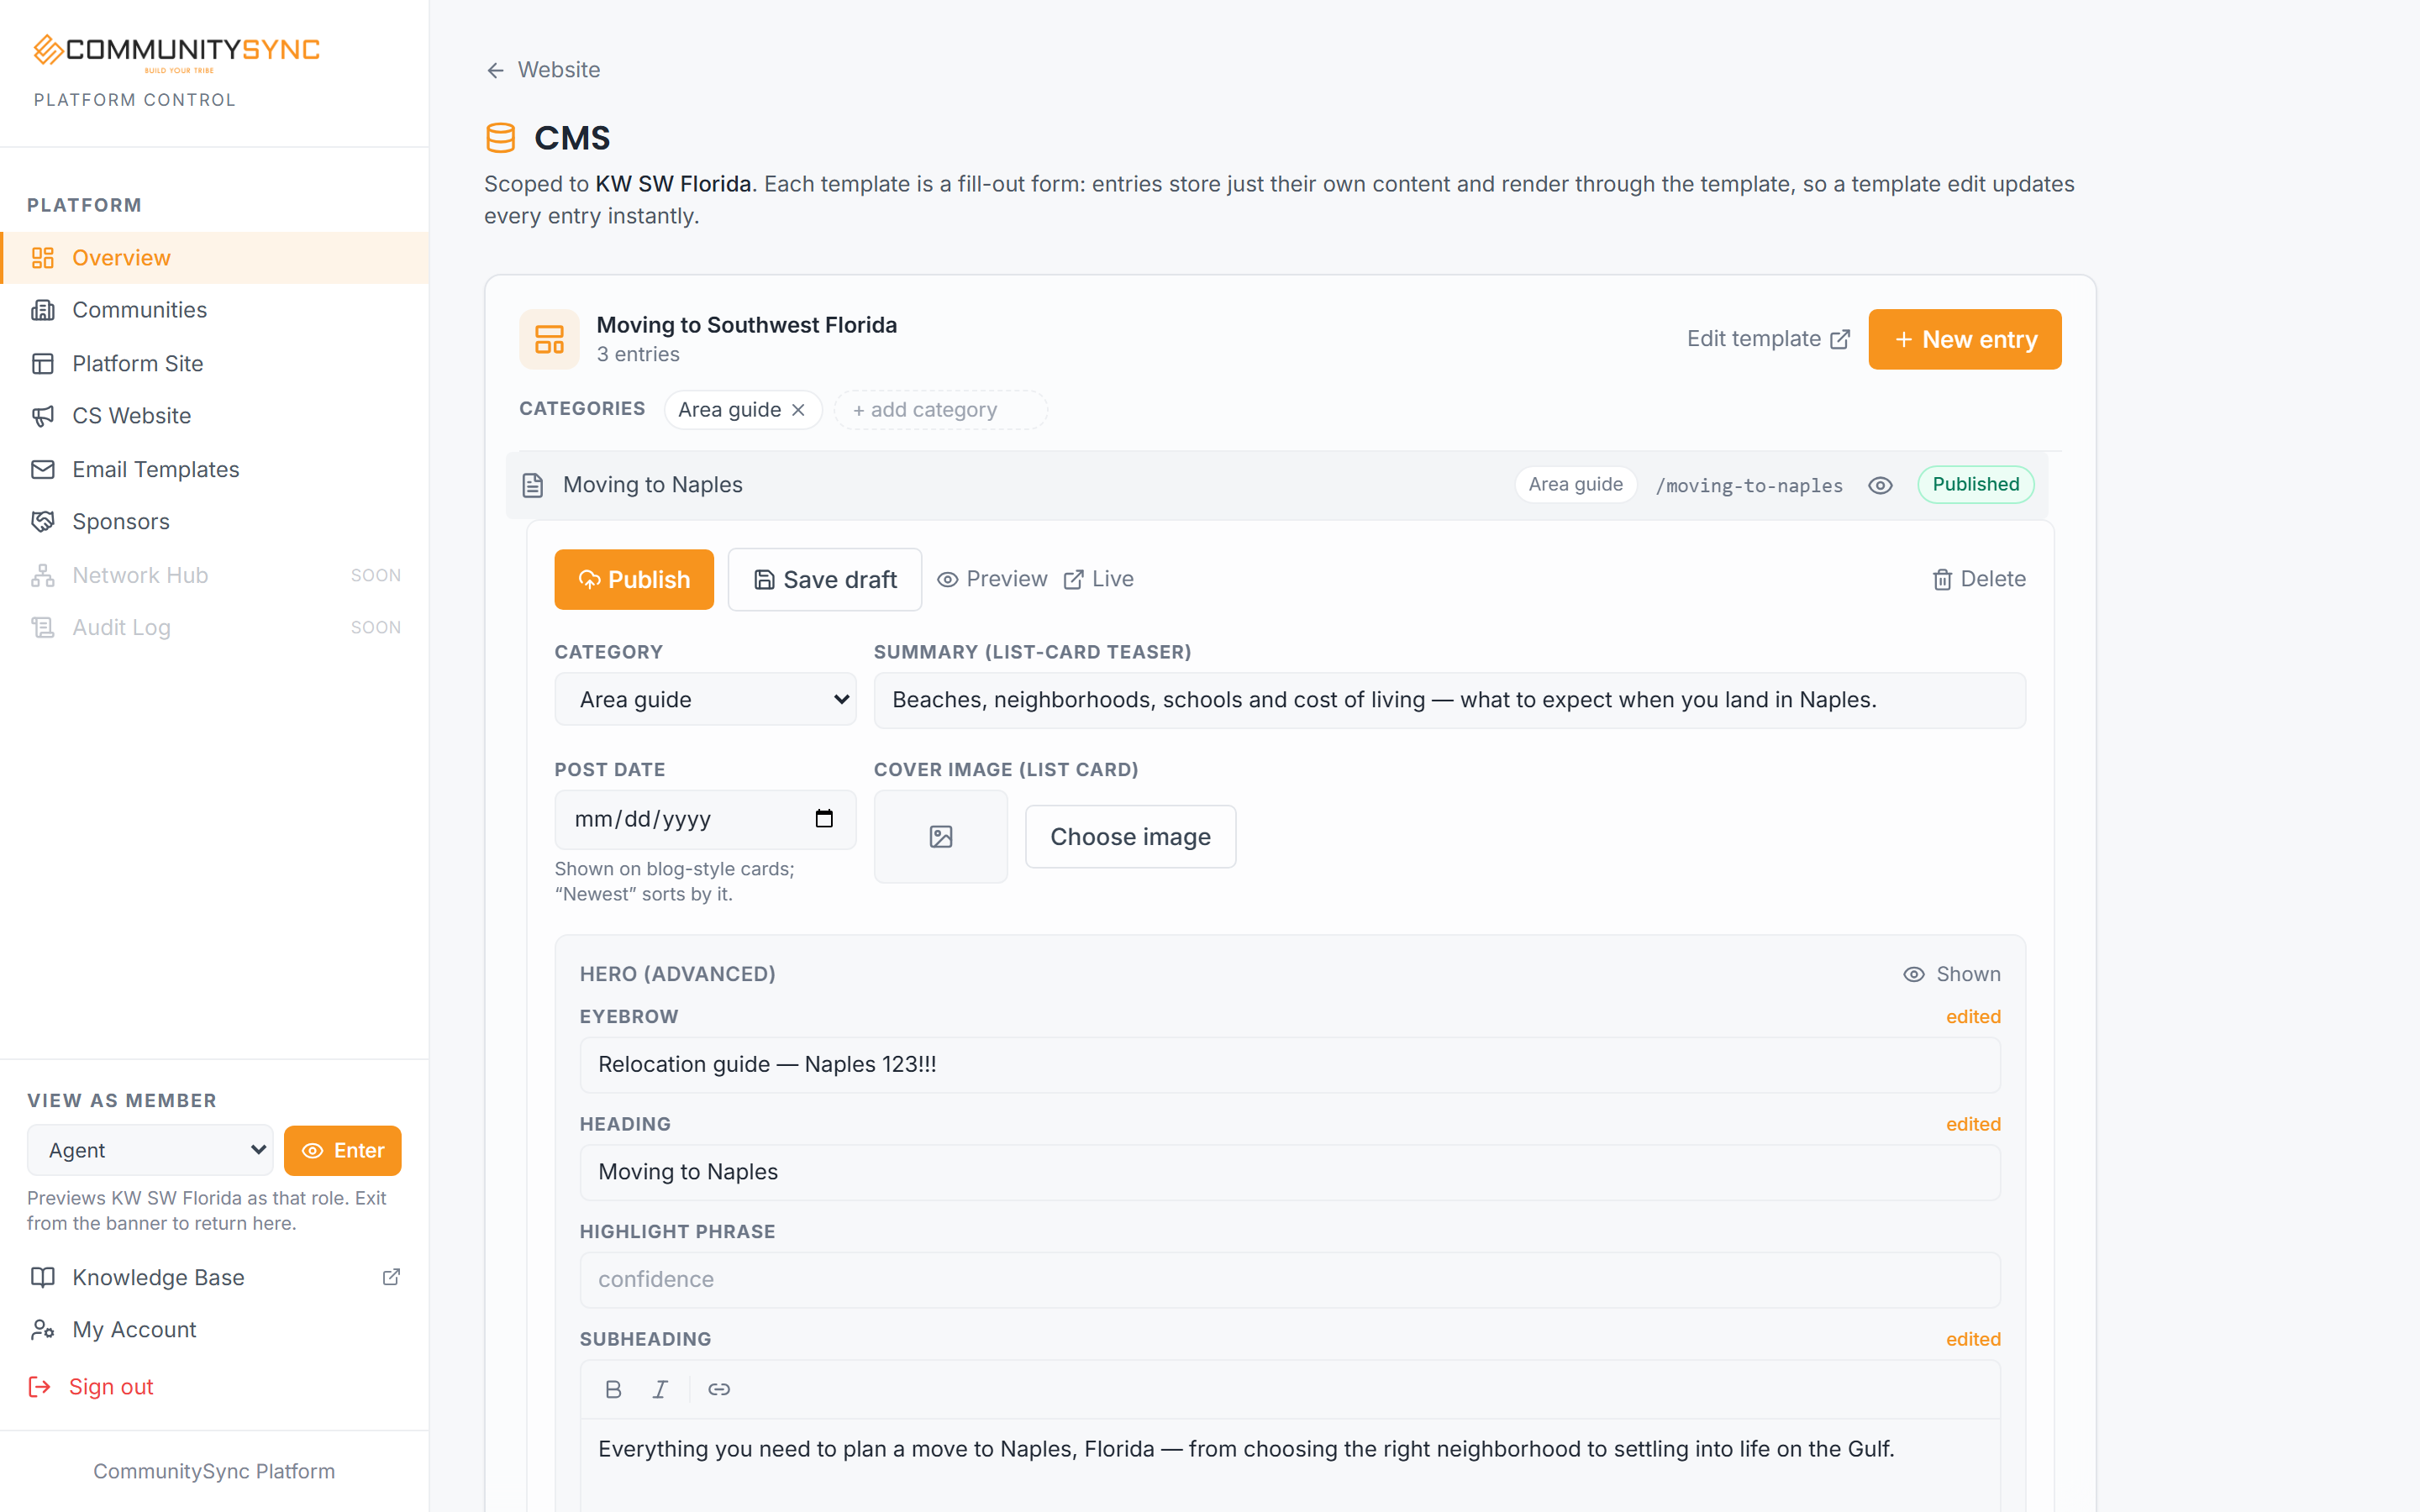
An open entry is organized into four tabs, with one action bar above them — Publish, Save draft, Preview, and Delete apply to everything across all four:
- Write — the entry's content fields (this section).
- Details — the card metadata used when the entry is listed: category, summary, cover image, post date, and the byline author.
- TL;DR & FAQ — a summary callout and FAQ for the entry, with AI drafting. See Add a TL;DR and FAQ to a post.
- SEO — the entry's search snippet and share preview. See Set a post's search snippet and share preview.
Edit the entry's content
The Write tab mirrors the template's layout, one field per editable block. The template supplies a default value for every field; your entry inherits those defaults until you change them.
- Edit any field to override the template's value for this one entry. Overridden fields are marked edited.
- To go back to the template's value, clear the field — it re-inherits the default.
- Use a block's Shown / Hidden toggle to include or drop that block for this entry only, without touching the template.
A few things to know:
- Text fields and structured lists can both be overridden per entry. A list (FAQ items, feature cards, gallery images) edits as a stack of item cards — add, remove, and reorder items, or use Reset to template to re-inherit the template's list.
- Style options (such as layout and appearance dropdowns) live on the template, so they stay the same across every entry.
- Changing the template's layout changes it for every entry that still inherits those values — that's the point of a collection.
Set the entry's card details
The Details tab holds the card metadata — the information used when the entry is listed alongside others (for example on a blog index):
- Category dropdown — which category the entry belongs to.
- Summary — the teaser line shown on the entry's card (it also becomes the entry's default search description).
- Cover image — chosen through the image picker (also the default social share image).
- Post date — the date shown on the entry; "Newest" sorting uses it.
- Author (byline) — who the entry is credited to. The byline shows on the post and powers its author markup.
Card details save with the rest of the entry — use Save draft or Publish.
Save or publish
One save covers the whole entry — content, card details, TL;DR & FAQ, and SEO together:
- Save draft keeps your work without putting it live.
- Publish takes the entry live — as long as the two conditions below are also met.
To remove an entry, use its Delete control. Delete affects only that single entry; the template and all other entries are untouched.
Blog posts
A blog is just a collection with a blog-style layout. If you're setting up posts, see Add a blog for the full walkthrough — the entry mechanics on this page are exactly the same.
Troubleshooting
My entry is Published but not showing on the site
Publishing the entry is only one of three things that must all be true before it appears live:
- The entry is Published (the row shows a Published badge).
- The template's layout is Published — open the template in the editor and use Publish layout. A brand-new template whose layout was never published won't render any of its entries, even published ones.
- The site is Live.
If your entry still isn't showing, the most common cause is the second one: the entry was published but the template's layout was never published. Publish the layout and check again. For taking the whole site live, see Take your website live.
My field keeps showing the template's text instead of mine
If a field snaps back to the template's value, it was cleared and re-inherited. Type your text into the field again — once it shows edited, your value is the one that will be used for this entry.
I can't find where to edit a style option
Style dropdowns (layout and appearance choices) aren't editable per entry — they're set on the template's layout in the editor, so every entry shares them. Text fields and lists, on the other hand, can be overridden entry by entry in the Write tab.