
Add a blog to your website
A blog gives your community a place to publish articles that keep members engaged and give your site fresh content over time. Under the hood it's a CMS collection: one Blog Post template that lays out every post, a /blog index page that lists your posts as cards, and each individual post saved as an entry. This guide walks you through the pieces and gets your first article live.
Only community owners and admins can edit the website, from inside the orange platform panel. Community managers and agents don't have access, and there's no member-facing editor.
How a blog is put together
Three things work together to make a blog:
- The Blog Post template — the per-post layout (hero, body, FAQ, and call-to-action). Every post you write is poured into this same template.
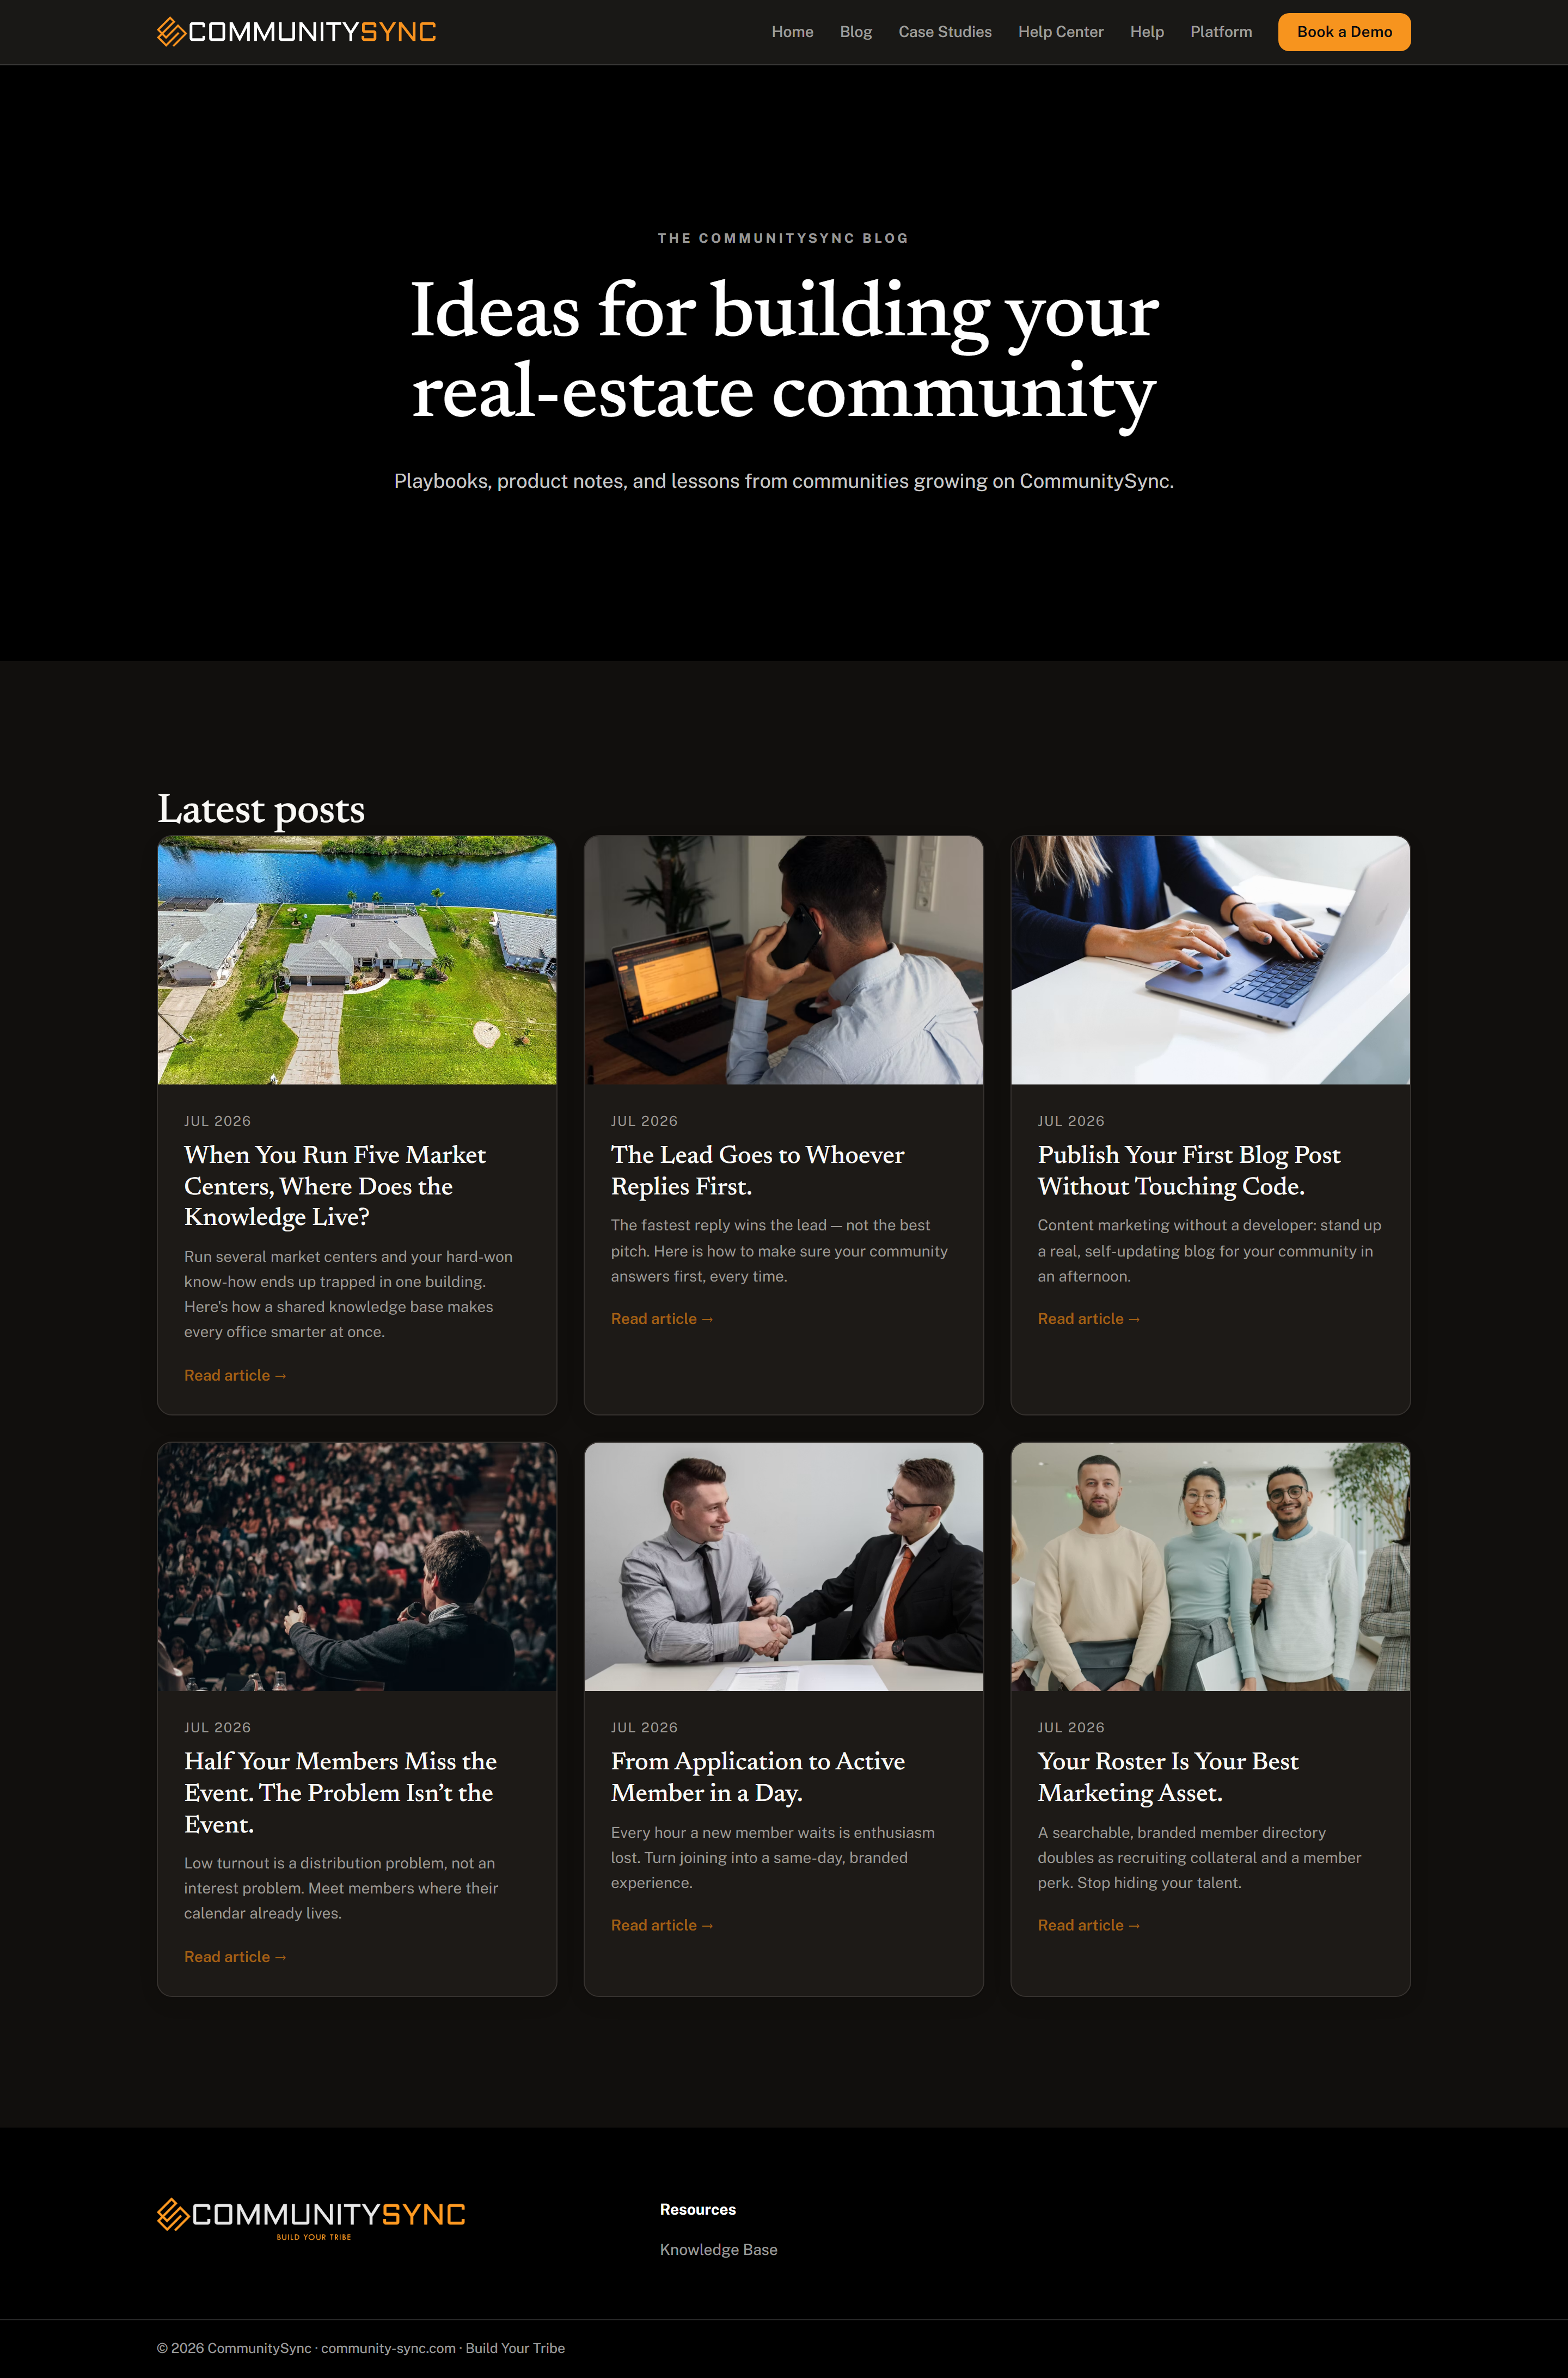
- The /blog index page — the page members land on to browse all your posts. It carries a dynamic Entry list block set to the "blog" card style: cover image, date, and excerpt, with the newest post first.
- The posts themselves — each one is a CMS entry. Add a post and its card shows up on /blog automatically.
If you're new to how collections work, start with CMS collections overview.
Set up the /blog index page
The index page is what makes new posts appear on their own. The key is using the right block.
- Open the website editor and go to the page you want as your blog index (typically /blog).
- Add an Entry list block and point it at your Blog Post collection.
- Set its card style to blog so each card shows the cover image, post date, and excerpt, newest first.
Use the dynamic Entry list block for the index — NOT the static "Blog cards" block. The Entry list pulls your real posts in automatically; the static block would need you to hand-edit cards every time you write something new.
Publish your first post
- Open the CMS and find the Blog Post template card.
- Click New entry.
- Give the post a title.
- Fill in the post content fields — the hero, body, FAQ, and call-to-action.
- Set the entry's Category and Summary (the summary becomes the excerpt on the card).
- Add a Cover image — this is the picture shown on the blog card and at the top of the post.
- Set the Post date — this drives the date on the card and the newest-first ordering.
- Publish the entry.
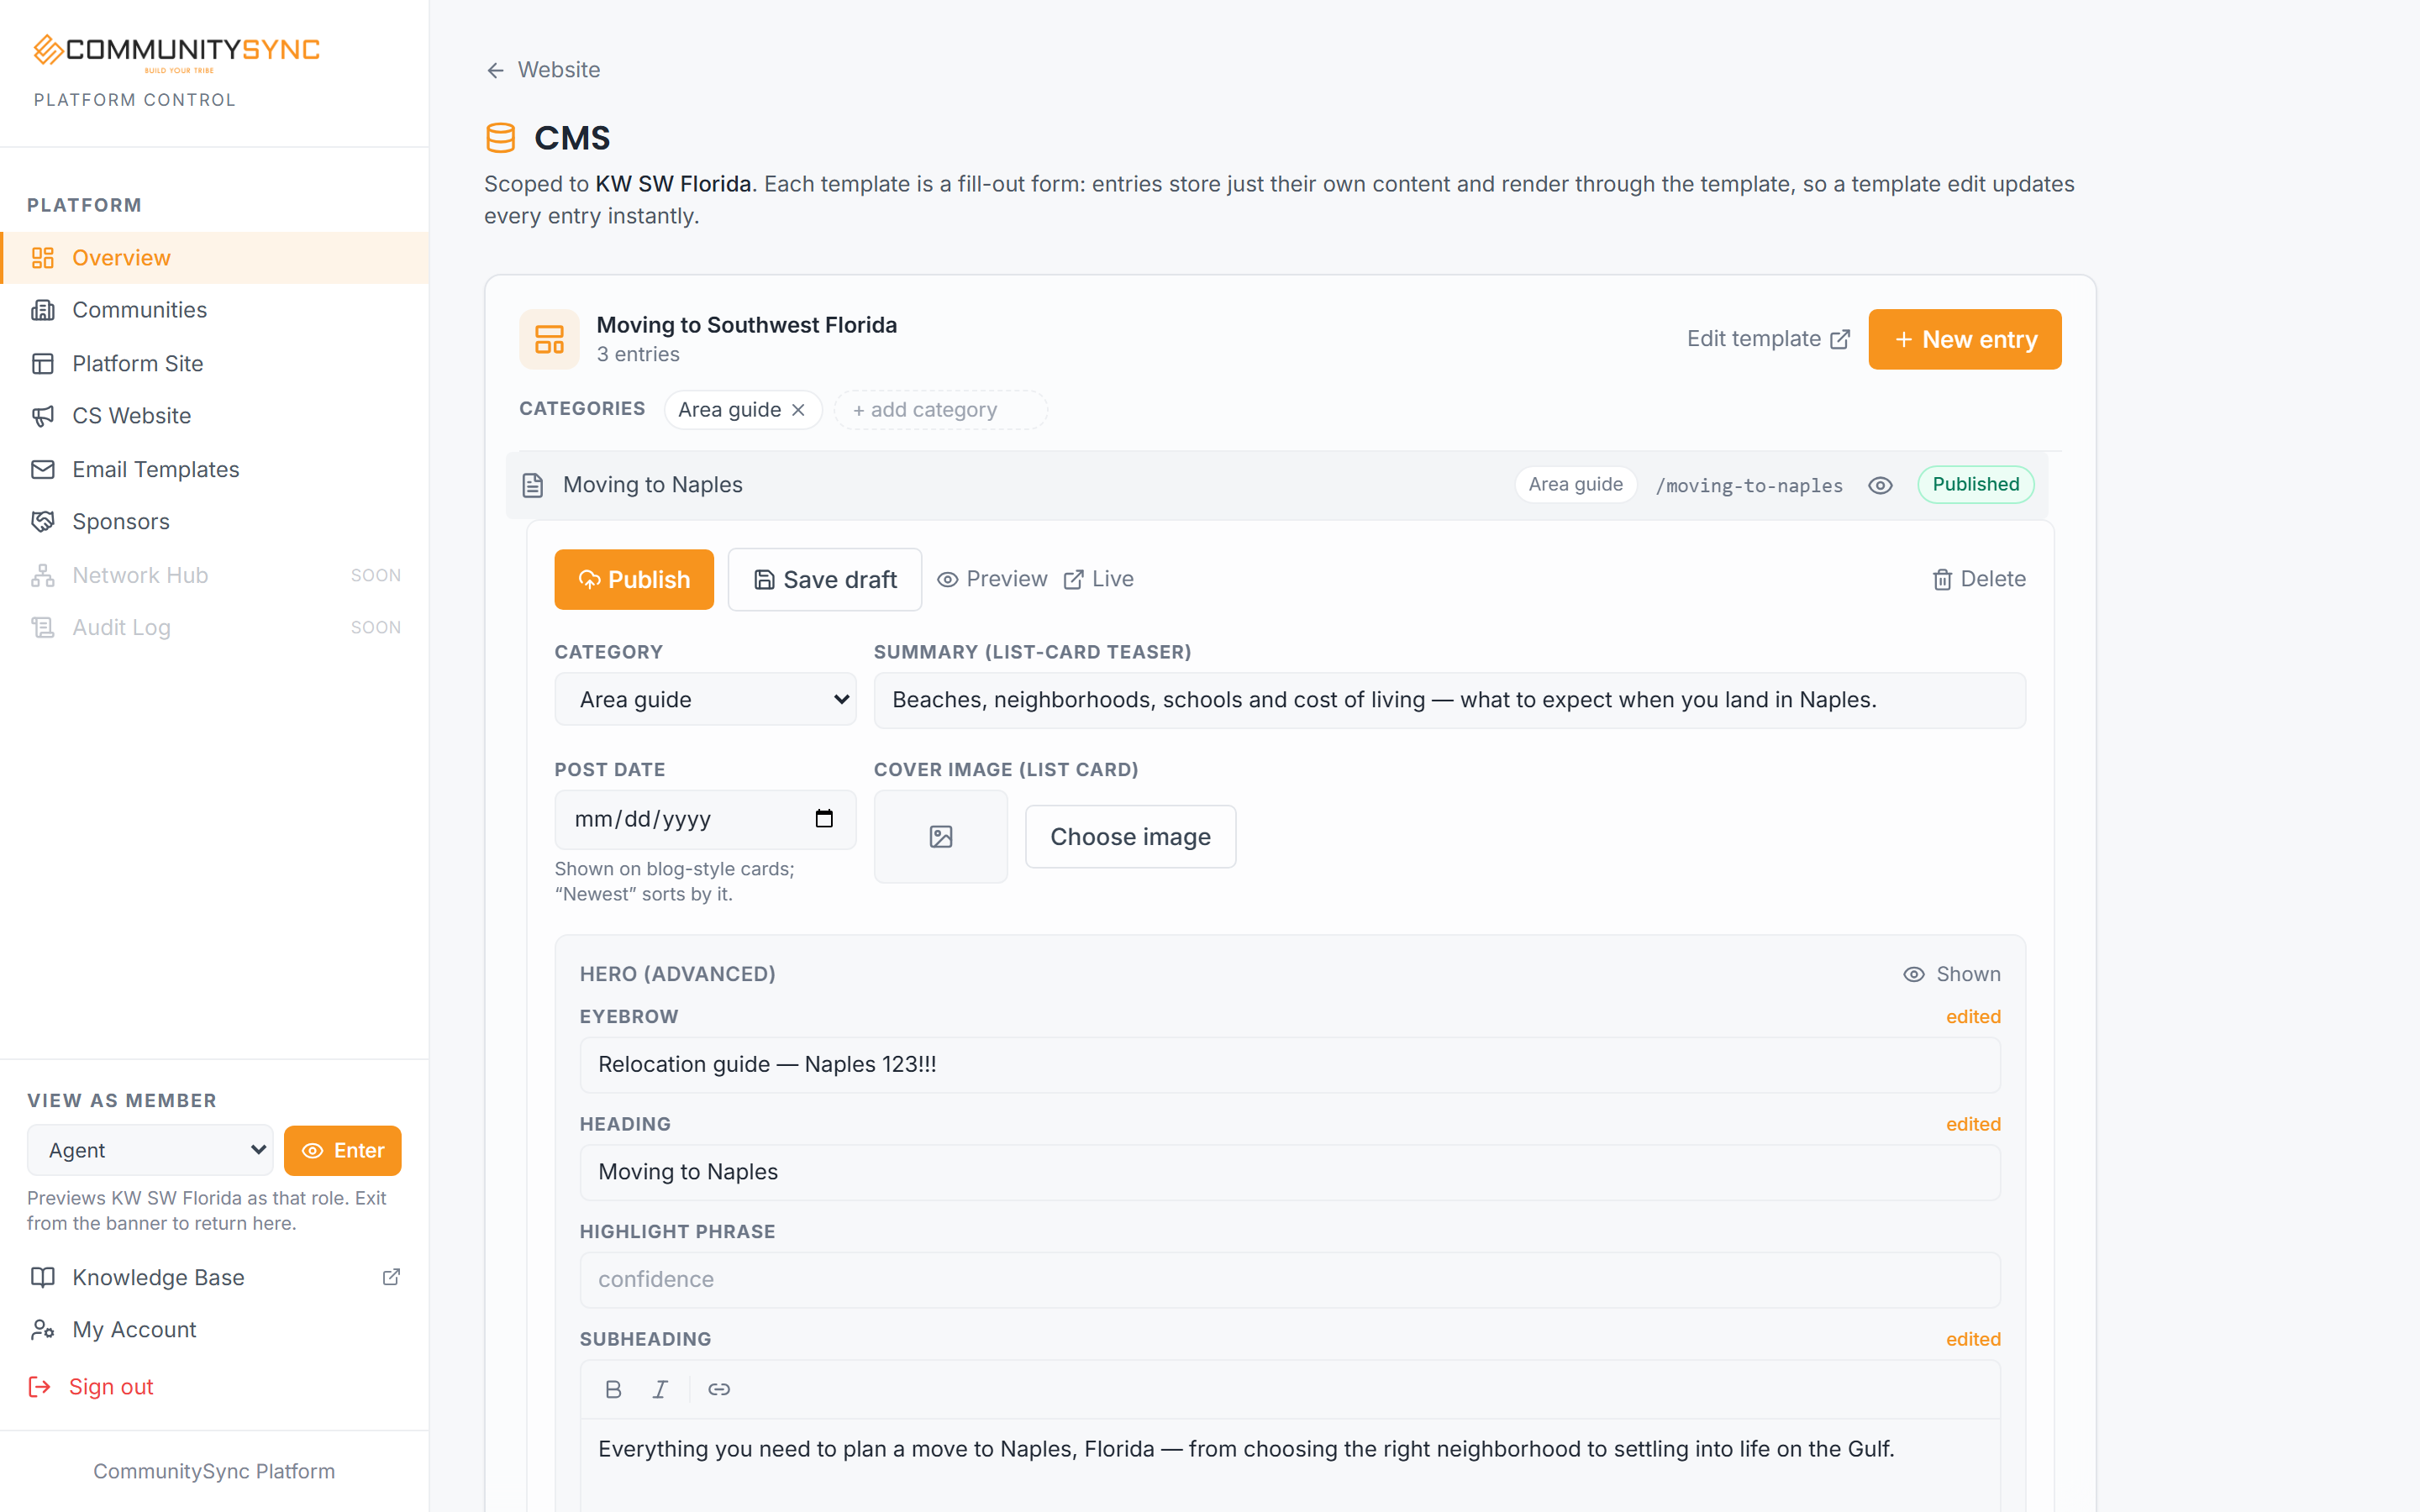
Also make sure the Blog Post template layout itself is published — the post needs both its entry and its template live to display correctly. Once published, the new card appears on /blog on its own; you don't have to touch the index page again.
What to reuse
The same collection-and-template pattern powers other content hubs. If you want a downloads or guides section rather than dated articles, see Build a resource center.
Troubleshooting
My blog cards have no image or date
A card looks bare when the post is missing a Cover image, a Post date, or both. Open the entry in the CMS, set both fields, and republish. The cover image feeds the card's picture and the post date feeds the date label and the newest-first ordering — without them the card renders empty in those spots.
New posts aren't showing up on /blog
Check that your index page uses the dynamic Entry list block in the "blog" card style, not the static "Blog cards" block. Only the Entry list pulls new entries in automatically. Also confirm the post entry is Published and that the Blog Post template layout is published too.